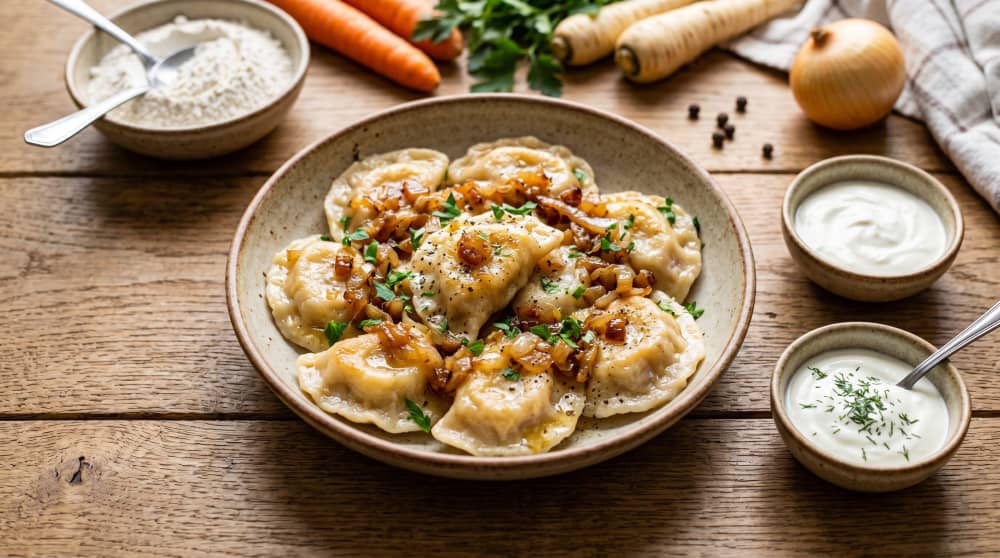
Sunday Pierogi with Aromatic Broth Filling
Transport yourself to the flavors of childhood with these classic pierogi, where nothing goes to waste. A juicy filling of meat from aromatic broth meets delicate, egg-free dough, creating a true feast for the palate. It's the perfect way to repurpose leftovers from Sunday dinner, giving them new life as a delicious dish that will delight everyone.
Ingredients
DOUGH
- 500 g wheat flour — (type 450 or 500)
- 250 ml water — sifted
- 2 tbsp vegetable oil — hot (but not boiling!)
- 1 tsp salt
FILLING
- 500 g boiled meat — (rapeseed or sunflower)
- 1 pcs carrot — (preferably a mix: beef + chicken/chicken thighs)
- ½ pcs parsley — (from the broth)
- 1 pcs onion — (from the broth)
- 2 tbsp butter — large
- 3 tbsp chicken broth — finely chopped
- 1 tsp marjoram — (clarified or regular)
- 1 pinch salt — (to moisten the filling)
- 1 pinch black pepper — dried and rubbed between your fingers
- 1 pcs garlic — to taste
- 1 pcs egg — to taste
FOR SERVING
- 100 g lard or bacon — optional
- 1 pcs onion — clove, pressed through a garlic press
Instructions
Dough
- 1
Pour the sifted flour onto a work surface or into a large bowl, make a well, and add salt. Pour in the oil and warm (not boiling – about 70 °C) water. Mix with a wooden spoon until the mixture comes together.
- 2
Knead the dough by hand for 5-7 minutes, until it becomes smooth, elastic, and doesn't stick to your hands. If it's too dry – add a tablespoon of water; if too wet – add flour.
Filling - step 1
- 1
Carefully remove the meat from the broth from the bones, cartilage, and membranes. If you have chicken skin – remove it. Cut into smaller pieces.
- 2
Sauté the onion in butter over medium heat for 6-8 minutes, until golden and sweet – don't burn it, or it will dominate the flavor of the filling.
Filling - step 2
- 1
Grind together through a meat grinder with medium holes: the meat, cooked vegetables from the broth (carrot, parsley), and the sautéed onion with butter. Grinding together distributes the flavor evenly.
- 2
Add marjoram, salt, pepper, optional garlic, and egg to the ground mixture. Pour in 3-4 tablespoons of cold broth and knead the filling by hand like dough until it becomes uniform and moist. Taste – season boldly, the raw dough will dilute the flavor somewhat.
Shaping
- 1
Rolling. Sprinkle the work surface with flour. Cut off 1/3 of the dough (cover the rest so it doesn't dry out). Roll out thinly – to a thickness of about 2 mm. Cut out circles with a glass or round cookie cutter (ø approx. 7-8 cm).
- 2
Shaping. Place a teaspoon of filling on the center of each circle (heaping, but so that it can be sealed). Fold in half, carefully seal the edges with your fingers from the center outwards, pressing out the air. You can additionally crimp the edge with a fork.
Cooking
- 1
In a large pot, bring water to a boil, add salt (1 teaspoon per liter). Add the pierogi in batches of 10-15 pieces – so they don't stick together. Stir gently so they don't stick to the bottom.
- 2
When the pierogi float to the surface, reduce the heat and cook for another 2-3 minutes. Remove with a slotted spoon and place on a plate or wide platter.
Garnish
- 1
Render diced salt pork or bacon in a pan until golden brown. Add the onion, sliced into feathers, and fry for another 3-4 minutes. Pour this over the pierogi just before serving.
Notes
▲ Important note about the consistency of the filling: The ideal filling should be moist and slightly sticky, but never wet. If you notice it dripping from the spoon, add a tablespoon of breadcrumbs. If it is too dry and crumbly, add a tablespoon of broth.
Faster shaping with two people: The work goes more smoothly when one person rolls and cuts out the dough, and the other takes care of shaping the pierogi. Place the finished pierogi on a floured cloth so they don't stick together.
What to serve with? Classically, serve with cracklings of salt pork and sautéed onion. For a lighter version, melted butter with parsley will work well. Ideal additions to drink are compote, kefir, or sour cream with dill.
Freezing: Spread the raw pierogi on a floured board and freeze individually (about 2 hours). Then transfer to a zip-lock bag. Cook them straight from the freezer – add to salted, boiling water and cook for 4-5 minutes from the moment they float to the surface.
Reheating: Pierogi are most delicious when fried in butter the next day – they gain a crispy crust and a soft center. Just put the cooked pierogi in hot butter and fry for 2-3 minutes on each side.
Culinary variations: To give the filling a deeper, autumnal flavor, add 200 g of sautéed mushrooms. You can also experiment with nutmeg, a tablespoon of Dijon mustard, or a little bit of sautéed pickled cucumber.
*Remember that the preparation time given assumes you already have broth ready from the previous day (this is a classic way to use it!). If you are starting from scratch, add an additional 2.5-3 hours to cook the broth.